INTRODUCTION
- What is this project about?
One of the goals of the ‘Special Carriers’ unit is to construct carriers that fulfill the special and specific needs of certain objects, as well as consider the contexts in which a carrier can be used to enhance, supplement, or present the object to someone else; for example, a dinner party where guests are expected to bring gifts for the host presented in a semi-formal or formal manner.
This creates a scenario where we have to thoroughly consider the nature of the object including its form, purpose, and in some cases, cultural/societal connotations that the object is associated with.
- Why are carriers necessary? What are they?
Almost all products are placed, transported, and then sold using some kind of carrier. This creates a spectrum of primarily practical carriers (in terms of production, storage/transportation) and primarily aesthetic carriers (short term or even one-time use, meant for presentation, an element of surprise, etc.). It’s important to note that this does not mean one type of carrier is bad, and the other good. The quality of the carrier depends almost entirely on the nature of the object itself and the purpose it serves, as well as the intended uses of the carrier itself to convey, emphasize, or animate certain aspects of the unique object.
EXAMPLE OF PRACTICALITY-BASED CARRIER:

Pizza box: Constructed from a single sheet, easy to assemble, easy to stack both unassembled and assembled, holds a variety of pizza sizes with one set of dimensions (easy to produce). The vertical height keeps pizza toppings from being crushed and fits decently into hands when held, but does not take up too much extraneous space.
EXAMPLE OF AESTHETICS-BASED CARRIER:
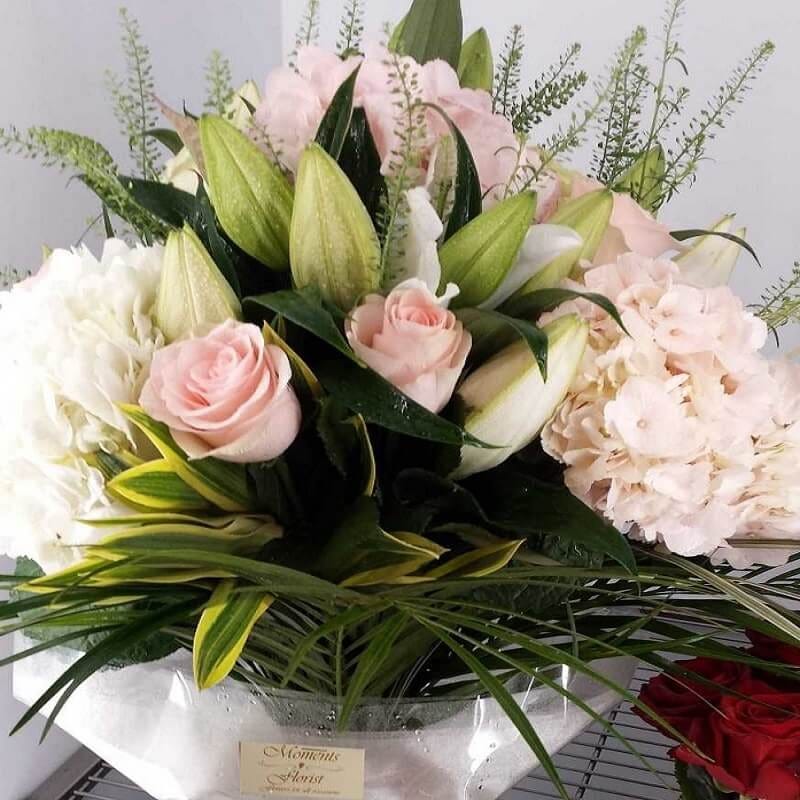
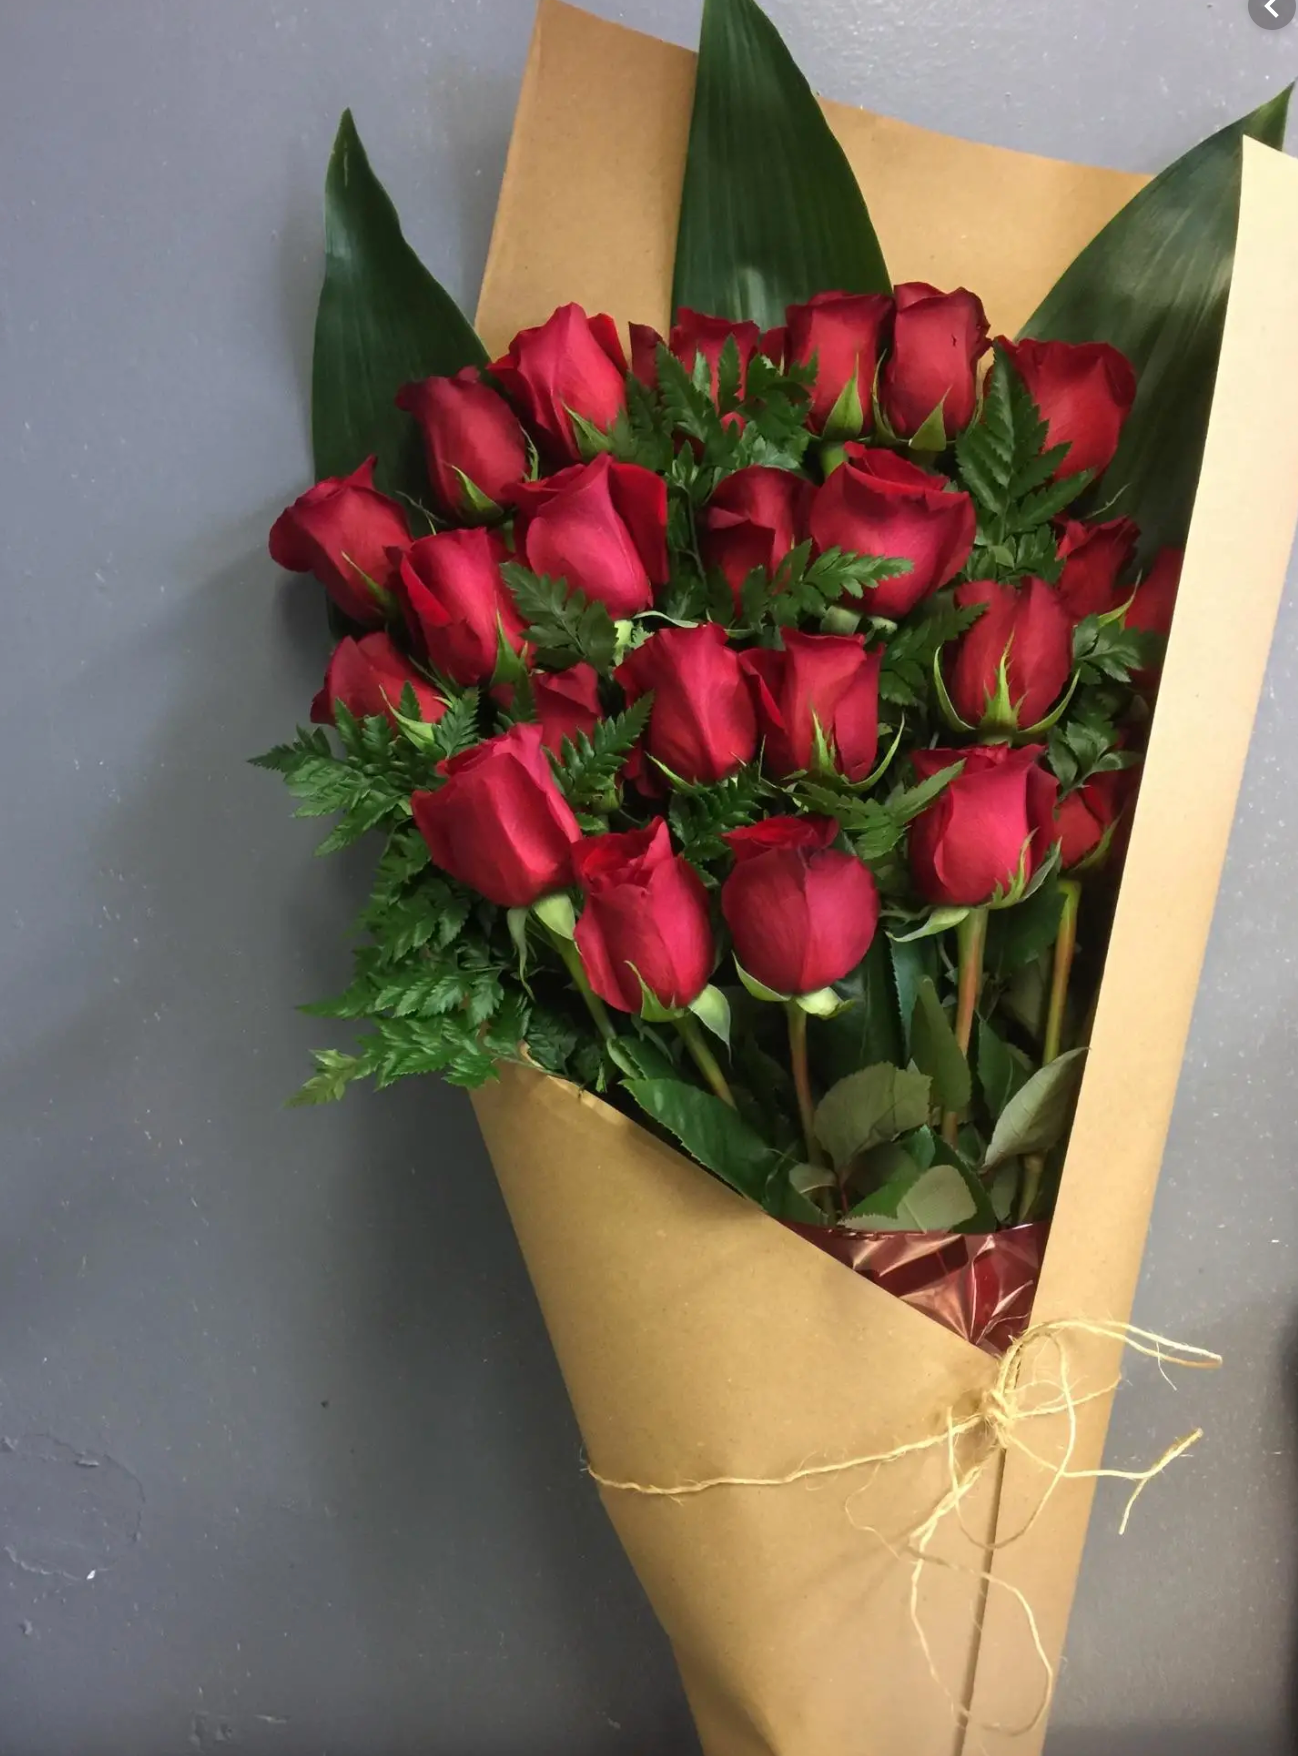
Bouquet of flowers: Enhances the flowers by bunching them at the stem and creating a cone shape that draws the eyes of the viewer to the flowers on top. The tapered bottom allows for easy holding (roughly the size of a hand).
HOWEVER:
The pizza box is not purely practical: There is a sense of reveal/excitement when opening the pizza box.
The bouquet of flowers is not a purely aesthetic design: The bottom is generally filled with water, which allows the bouquets to sit upwards without crushing any of the flowers. It also keeps the flowers arranged as they are (which is often an intentional choice by the florist or customer).
There are also many more examples of carriers don’t fit along the spectrum mentioned above, and one interesting example is the box used to carry engagement rings:
SPECIAL CONNOTATIONS/IMPORTANCE OF OBJECT & ITS CARRIER:
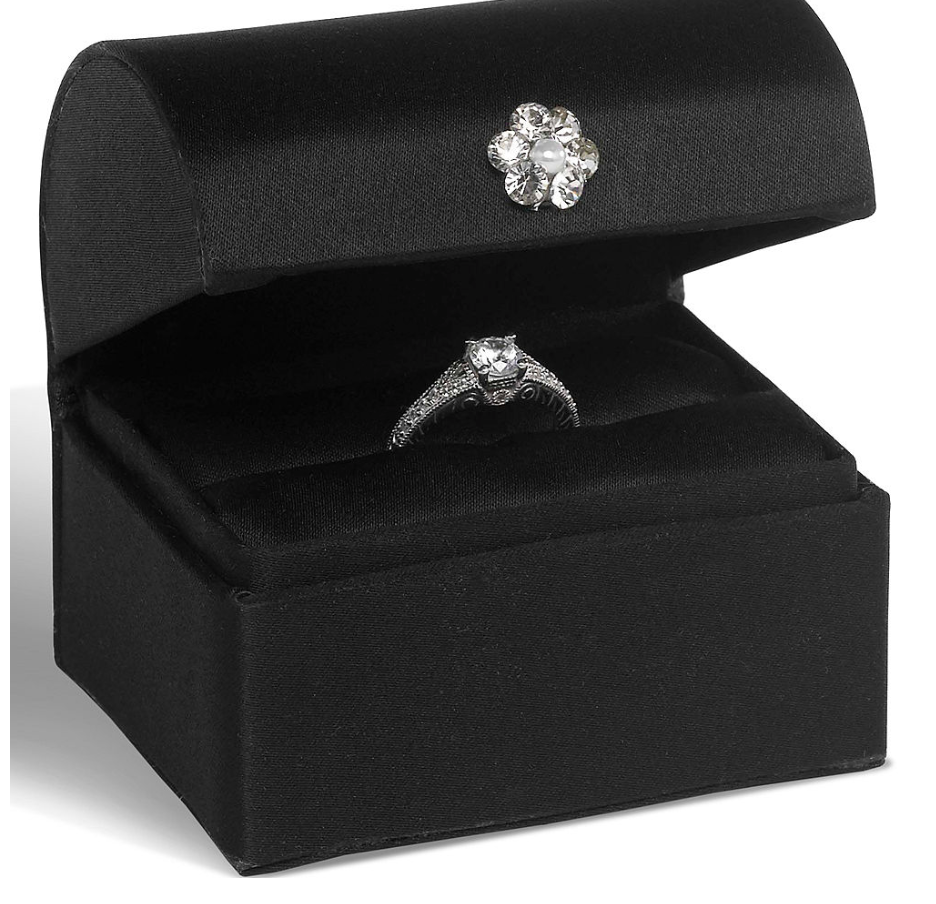
Ring boxes: often discreet (unidentifiable rounded-cube shape) as to not reveal the contents (can only approximate or guess what the object is by the approximate size of it), but generally very culturally revealing as an object as it so commonly accompanies a ring that we are pretty much conditioned to recognize its contents on sight.
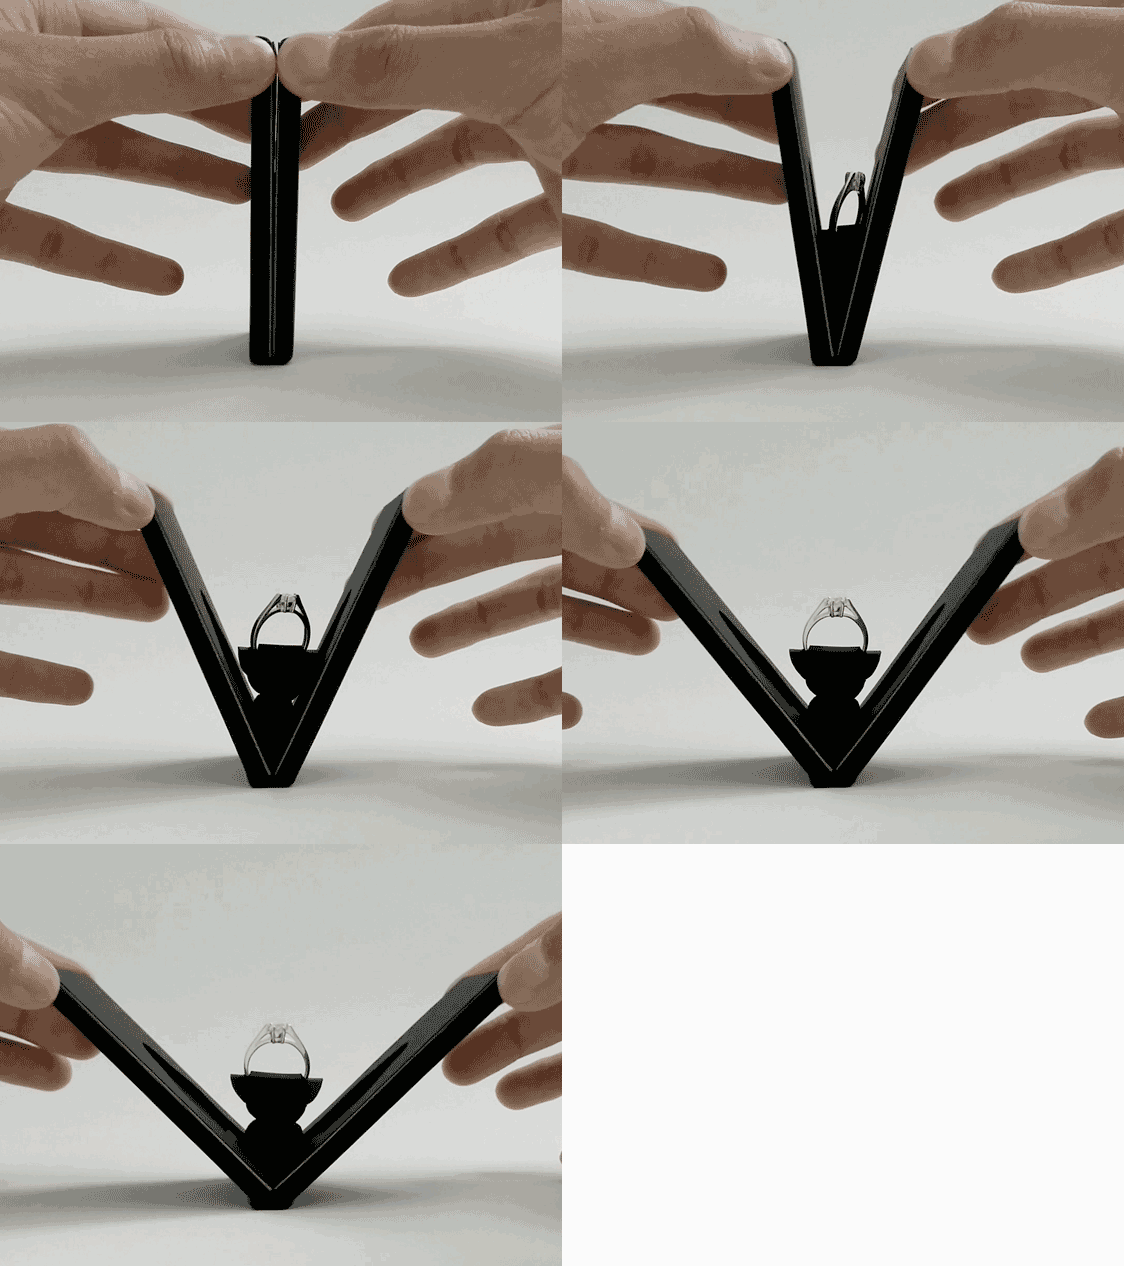
However, what about a more innovative/recent take on the box? This thinner & collapsable ring carrier subverts our general expectations of a ring box through its vastly different appearance.
https://www.amazon.com/Slim-Hidden-Proposal-Engagement-Box/dp/B078YCVT4Q
IS INNOVATION INDICATION OF A GOOD CARRIER?
Traditional ring box: It offers full protection for the ring, which is very delicate. It almost acts like a small safe and eases the anxiety of accidentally losing or dropping the box/ring. If the ring is also kept as long-term storage for the ring, it can also be easily placed somewhere and displayed. (You can see this sometimes in a jewelry store display)
New ring box: May suffer from the same ‘overtly recognizable’ problem as the traditional ring box if it becomes too common, and the surprise element that gave it an ‘advantage’ over the traditional ring box is now becoming null. Additionally, its form offers less damage protection to the ring as the form is definitely less structurally sound than a cube. It also does not allow storage/easy presentation as the jewelry store display does.
What are some SPECIFIC examples of efficient or good carriers in the real world? In what context?
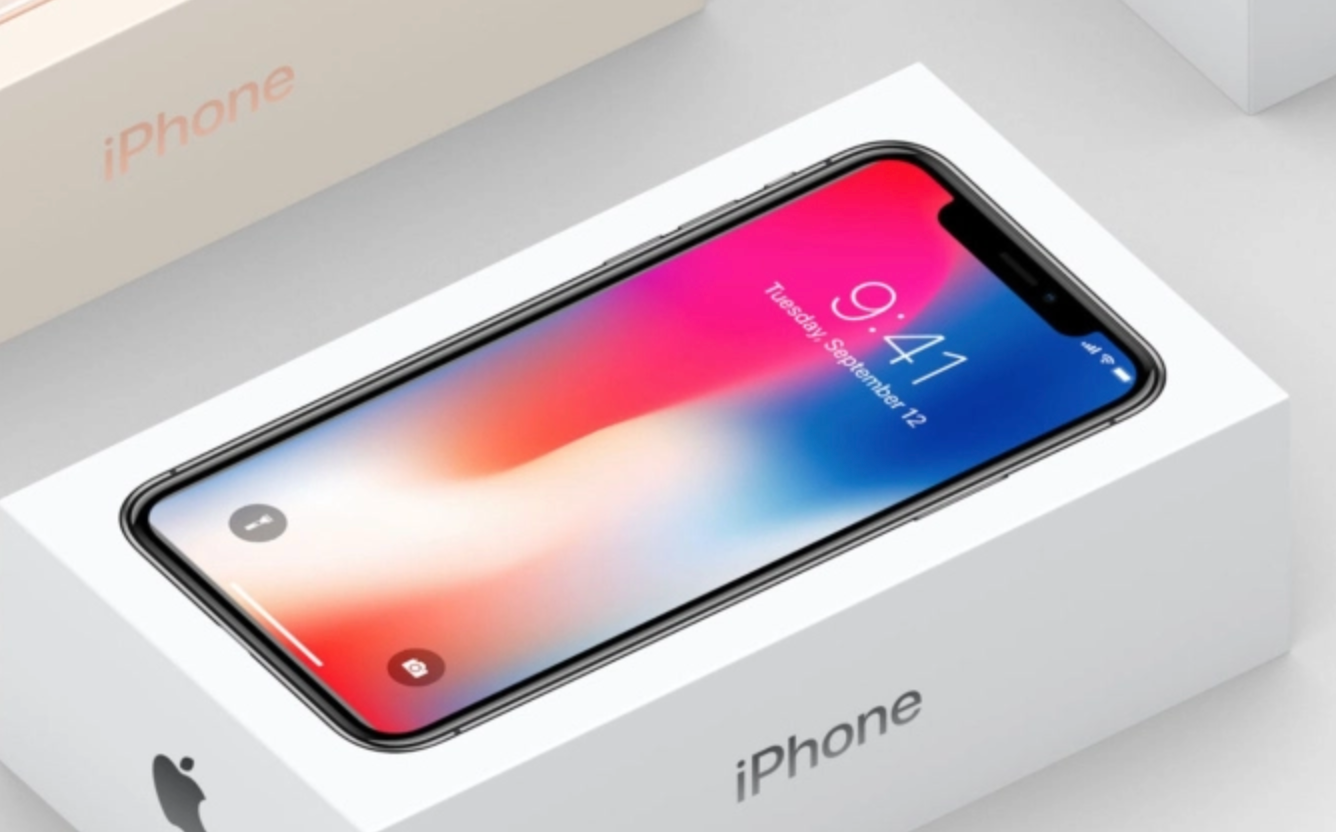
EXAMPLE #1: iPhone PACKAGING:
Example of specific product packaging — an iPhone is often still distinguished apart from just any generic phone model. [Psychology: specificity and categorization of objects]
Form: Simple rectangular box the shape of the iPhone. Different/various dimensions for each dimension of the phone. All white which gives a pristine and clean appearance. The box is also relatively heavy and is a lot thicker than the actual phone itself. Some people tend to describe the iPhone packaging to resemble ‘brick-like’.
Is the Product identifiable from within the carrier? : to-scale Photo of iPhone on the cover almost makes it seem like you’re looking at the product itself through the carrier.
Interaction: Very smooth sliding action (perfect fit), incredibly satisfying. Feels high-end due to clean interaction and precise appearance.
Is it practical?: Relatively safe as a carrier — the material is durable but not necessarily enough to protect the phone if it were hurled at the wall aggressively. However, one should consider that on some level, the iPhone generally wouldn’t be treated that way due to its perceived nature as a relatively expensive and precious object. Therefore, it makes sense that the designers wouldn’t necessarily prioritize safety to the extreme lengths of protecting against brute force/strength.
Do People Enjoy the Carrier?: As mentioned previously, this carrier is very satisfying to open despite its minimalistic simplicity. This may because the act of receiving or purchasing an iPhone is inherently an enjoyable event, and the interaction is actually simple in order to supplement the natural enjoyment the object provides. If the opening was more flashy, it may actually detract from the product itself, which makes it less efficient as a ‘carrier’.
Other factors:
- When compiled, the object is easily stored. This makes transportation at the end of the producers/retailers much more simple. The ‘thickness’ of the packaging as mentioned above also adds to this factor to some extent.
CARDBOARD EXPLORATIONS & Getting to Know The Material


Corrugated Cardboard
- Made of three layers of paper (hence the ‘corrugation’)
- Each individual sheet is pretty sturdy, becomes curled when taken apart.
- Due to the corrugation, it’s generally a good idea to score your cardboard along the corrugation & refrain from cutting through it in order to maintain structural integrity.
Creating Cardboard Corners
Cardboard corners could be put together in a variety of ways, including the number of pieces you start with. Having three pieces, for example, means that you would need to connect the pieces together afterward, using either adhesive or the cardboard itself — like tabs, interwoven pieces, or other fasteners.
What are the main structural components of a ‘corner’?
A cube corner is composed of three equal side faces of squares connected by a virtual point. When two are slotted together, they should ideally form a cube. This poses certain constraints on the process and end product created, such as the overall dimensions of the cube (6x6x6) that have to be isometric.


How do you blueprint your ideas successfully?
While trying to come up with ways of limiting the initial number of cardboard pieces used, I had trouble figuring out how the different ‘faces’ of the cardboard in 3D would translate to 2D when I cut it out of the cardboard. Eventually, I used a grid/quadrant format system in order to make a ‘blueprint’ before. This ended with me making fewer mistakes overall.
What kind of Adhesive are you using?
- Hot glue is a fast working adhesive that allows you to most efficiently create the 90-degree angle between planes. It is also extremely sturdy and when applied properly, you’ll be more likely to rip the cardboard first than the adhesive itself. However, it doesn’t always dry clear, especially when you need to make last-minute adjustments that end up leaving the glue white and ‘stringy’
- Elmer’s (Craft) Glue is relatively slow drying, but because not a lot can be used at a time, it dries almost invisible. This is probably the most suitable for subtle stabilizing and sticking together pieces that require less structural support. It is definitely difficult to use Elmer’s glue alone to hold three relatively tall pieces of cardboard together, and even afterward, it’s relatively unstable.
- Tape is difficult to use precisely (both masking and clear plastic) when working with inward edges and has a tendency to peel up bits of the cardboard (outermost layer) with rigorous/rough treatment. While less rigid in structure than glue (can definitely simulate some aspects of mechanical motion) it’s not a good idea to rely on it as it is much more easily removed from the cardboard than the glue options. However, using washi (paper) tape to see how pieces fit before using hot glue or another adhesive can prevent accidents and mistakes with fitting during the construction process.
- Gluestick: no.
- Superglue: slides around a lot more than one would initially expect, tends to be messy and despite the precise applicator, generally difficult to actually apply well.
Cardboard Corners: Class Discussion
What kind of ways are other people choosing to put together their cardboard corners?

Aesthetic vs. Function:
While the assignment did have certain limitations placed on it, it was definitely fascinating to see there were still many, many different ways my classmates responded to it. In general, we discussed how the methods and final presentation of the corner could be analyzed by components such as their aesthetic and functional properties.
Some cube corners could be made to be collapsible by cutting the cardboard in a certain way that allowed it to simulate properties of string, which created an interactive experience for the user. It also allowed us to consider things like efficiency and storage.
Some cube corners focused had aesthetic/visual components that set them apart from the rest, like peeling away a layer of the cardboard to show the corrugation to appear more visually interesting.
however,
This may be an instance where a focus on aesthetics ends up compromising the function of the corner. Without the third layer, the corrugated cardboard is approximately ⅓ less durable than before, if not more due to the process of peeling away the layer. This brings us to question how important structural integrity/durability over time is to our specific tasks with cardboard.
From this, we can take away that the use of cardboard requires a balance between aesthetics and practicality; if one starts to compromise the other, part of the overall craft is being sacrificed; for example, the ‘egg drop’ project commonly done in middle school is a good example of a project that often doesn’t take aesthetics into consideration, only function. While making a virtually indestructible box would allow us to safely transport our object from one place to another, it may not always feel like an appropriate solution under specific circumstances. Much like the iPhone packaging, sometimes extreme durability is not required or wanted.
IMPORTANT: aesthetics isn’t just the appearance of the carrier — its innovative nature, efficiency of use, and overall visual characteristics in motion are to be considered as well.
Along with this, we talked about other factors of production to consider, such as:
- Efficiency: How long did this take? Was it overly/(maybe even unnecessarily) complicated in its construction? Were there a lot of adhesives (fasteners) necessary for its construction that made it less about cardboard and more about the adhesive?
- At the end of the session, we were given the task to reconstruct the object we were given using cardboard.
CASE STUDY


Individually wrapped Lindor Chocolates (At Least 6)
These chocolate treats come in a folded paper (tetra pak?) bag. Each container contains ~10 individually wrapped chocolates.
I’ve personally ever eaten/received these chocolates as a “special treat” — they are rather delicate in their appearance with very decorative/fanciful packaging. Relatively ‘high-end’.
Not very easily destroyable, as the exterior shell of the chocolate is hard enough that the chocolates can survive with only aluminum/clear plastic wrapper as a wrapper inside a decently sturdy (but very easily squish-able) bag with 9 others of its kind. Pretty difficult to crush into something not at all spherical, but many of the chocolates I purchased came with dents and bumps. This is likely because of the weather, seeing as the chocolates were also pretty melted from the heat.
DIFFERENT DESIGN BLUEPRINTS FOR CHOCOLATES
- Cutting out the circle shape and slotting them together, and then gluing the paper ‘wings’ on the ends using ⅓ of the corrugated cardboard, torn open.


PROS:
- More accurately represents the weight of the object
- Easy to get precise & round
- Minimal use of adhesive
CONS:
- External appearance does not resemble the chocolate (gaps in between the cardboard pieces)
- The wings are much sturdier than they should be, as ⅓ sheet of corrugated cardboard is still much more sturdy than the plastic sheet the original chocolate uses as a wrapper.
- Slightly more durable than the actual chocolates
2. Geometrically Creating a hexagonal-like shell of the chocolate, and then pulling a sheet of corrugated cardboard through the opening of both ends (diagram below is probably more clear)


PROS:
- The exterior matches the actual chocolates (no ridges or gaps, nearly seamless in appearance)
- Relatively easy to get the same size
- Requires only 2 pieces of cardboard (efficient)
- Relatively the same durability as the chocolates
CONS:
- Needs a lot of adhesives to keep together due to its shape and size
- Weight is unrealistically light
- The shape is comprised of geometric flat-plane surfaces, somewhat non-spherical.
In the end, I chose to go with #2 and added pebbles/hot glue to the interior in order to get the desired weight. I also explored using tape to create a more realistic version of the ‘wings’ that did not have the same durability as the cardboard. While the overall shape did have harder ‘edges’ that are not present in the original, overall, the width and shape matched well enough with the original to act as a stand-in if necessary.
DESIGNING A “FUNCTIONAL” CARRIER: MECHANICS
CARRIER ITERATION #1
CONTEXT:
a dinner party has certain connotations. As previously mentioned, a dinner party is very clearly different from an experiment where durability and strength are the primary factors to consider. Of course, the visual appeal should not end up compromising the ability to actually use the carrier to transport the object from a particular place to the dinner party itself.
PRIMARY INSPIRATION
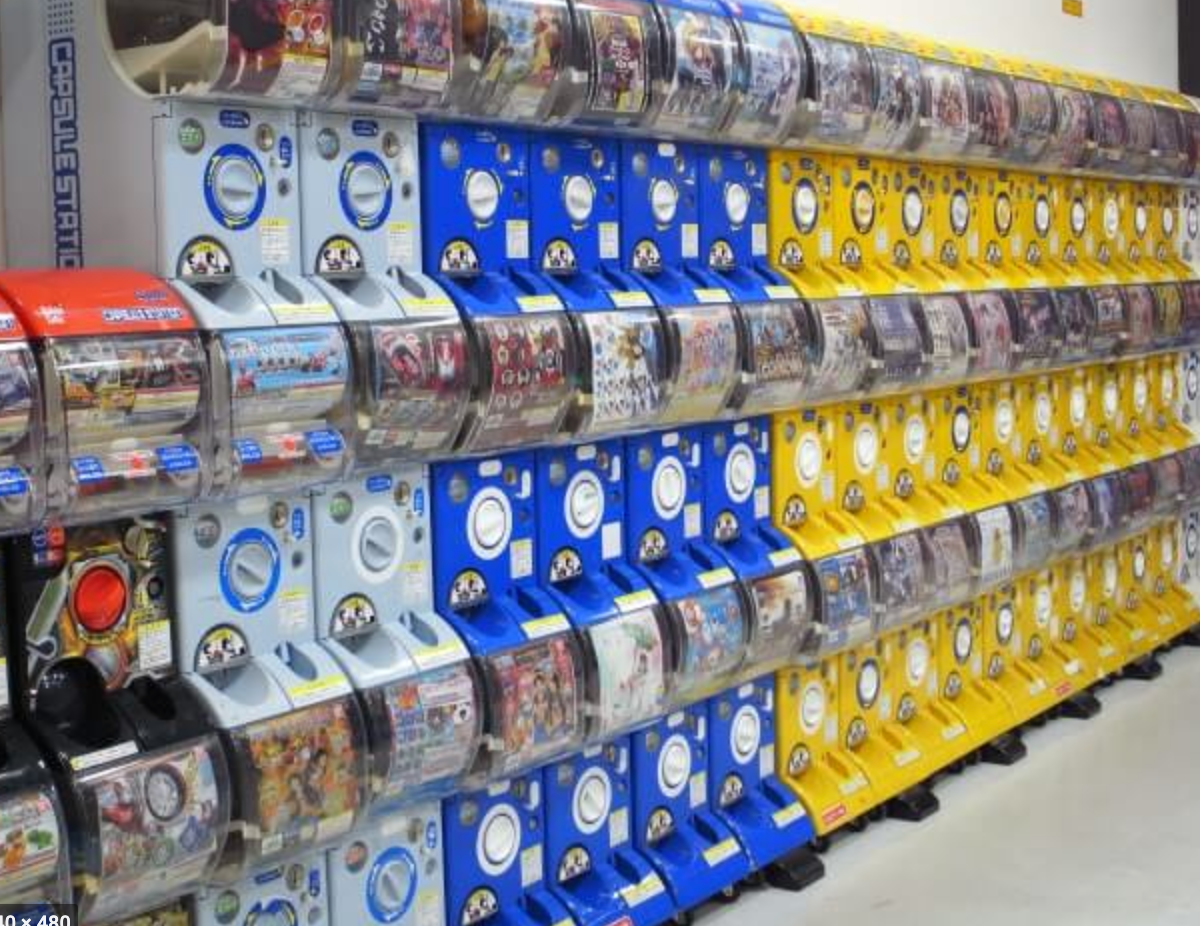
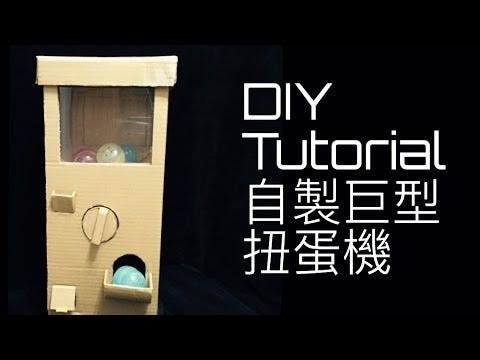
I was inspired by the delicacy of the individual wrappers — it made each of the chocolates feel significant and important on their own, rather than together as a set or collective. This combined with the roundness of the chocolates, I was reminded of the Gatcha-pon machines I would see a lot in Japan, where the user would insert a coin into a machine slot and receive a small item (generally a keychain or toy) in return, often in a round capsule that is able to crack open. So for my first iteration, I wanted to create a twist/rotation mechanism that mirrors how the Gatcha-pon machine works.
I watched a couple of YouTube videos of people exploring and recreating the same mechanism, and gradually simplified it until it was doable at a much smaller scale (which otherwise would’ve felt inappropriate in the context of the small & delicate chocolates).
END RESULT


PROBLEMS & CRITIQUES
REFLECTIONS AFTER WATCHING PEOPLE INTERACT WITH THE CARRIER
- Only one chocolate could be dispensed/stored at a time due to faulty measurements.
- Chocolates sometimes got stuck in the mechanism because the flat surface at the bottom made it difficult to get the chocolate to fall where the opening is — reaching into the opening was very difficult and not user-friendly.
- This was semi-counteracted by cutting a latch at the bottom to pull down in order to dispense the chocolate. However, this unnecessarily complicates the motions the user has to go through.
- The motion of twisting the front is not intuitive, and most of the users reported that they wanted to either slide it down (due to the cut of the entrance) or pull on it.
- Solution: A protruding piece of cardboard placed directly in the center of the rounded panel, which will ideally remind people of kitchen appliance nobs like the stove, or even the original Gatchapon machine.
- The box-like exterior gives no indication of the contents inside. While I originally designed this in order to give the user a sense of surprise, it actually had the effect of confusing them instead.
- Uses too many pieces of cardboard stuck together: not only is there a heavy reliance on adhesive, but the motions are not smooth due to inaccuracy of cutting when it came to individual pieces.
- Because of its box-like form, it did not necessarily feel like an adequate ‘carrier’. People had trouble holding it (particularly those with smaller hands)
GENERAL NOTES ON CLASS DISCUSSION — LIST OF FACTORS TO CONSIDER THAT MAY BE IMPORTANT TO THE CARRIER


Building confidence in your carrier
- Do people feel comfortable interacting and holding your carrier? Are there certain areas that inspire nervousness or doubt of stability?
- Seems to be most problematic when it comes to thin cuts of cardboard and tabs
- When scoring is messy, or parts of the cardboard are torn and worn from repetitive use.
- Shaky motions
Looking at how someone interacts with your carrier
- Do they know what to do?
- Are they confused with the interactive aspects of your carrier?
Position of the object in carrier
- Where is the object is placed? Is this deliberate & stable & logical?
Stability concerns
- Can your carrier stand by itself?
- Is the object appropriately ‘placed’ within the carrier?
Characteristics of the object
- What makes your object unique and how should you accommodate those characteristics?
How the carrier will be held
- Different types of handles vs. different sizes of handles
- How weight of the object is handled/distributed
- Certain handles, for example, make it more uncomfortable to hold for longer periods of time due to uneven distribution of weight across fingers.
- Do you need both hands to hold it?
How the object relates to the body and user experience
- Can you comfortably hold the carrier (enough space for handles)
- Do you instinctively know where to hold the carrier by?
- Observe where people instinctively reach for when given your carrier.
Looking at all the sides of the carrier
- Is there a distinctive front & backside of the carrier? Why?
Amount of closure/protection the carrier provides
- If your object is fragile, is it appropriately protected by the carrier given the circumstances?
Paying attention to the different states of the carrier (motions & interactions)
- How do the varying states of your carrier when put in motion change visual & structural aspects?
- Does one state of your carrier feel more exposed & vulnerable than another? Do the motions themselves add any worries or concerns?
Number of pieces it takes to fully construct the carrier
- Too many pieces may create more problems & liabilities when it comes to construction and use.
- An unnecessarily complex structure is less efficient.
- Additive vs. Subtractive methods: oftentimes, problems can be solved by limiting the pieces rather than adding more.
- Slow reveal & amount of exposure/transparency
- Does the slow reveal aspect inspire confusion or excitement/surprise?
Does it make the cardboard happy?
- What are some things that cardboard maybe isn’t meant to be able to do?
- Where should you score the cardboard?
- Watch out for torn edges, bad craftsmanship, etc
- Are you bending/using the cardboard in ways it’s not meant to be used?
Enjoyable experience for the user
- Watch people’s reactions when they interact with your carrier. Are they happy?
Balance of form & perceived value of the object
- Would you put something really expensive or valued in a carrier that looks like it’s meant to be discarded? (crumpled paper/really unstable and unrefined exterior)
Low penalty/consequence for misuse
- Would the carrier be able to withstand accidents & being treated the wrong way? Would a mechanism break because the user didn’t know how to use it?
Ability to hold multiplies
- Can your carrier hold the required number?
For our next class, we were told to prioritize a few (maybe 3) from the list and approach it from there.
DESIGNING A CARRIER
CARRIER ITERATION #2
Based on the critique from last class, I wanted to focus on:
- Limiting the pieces of cardboard needed to put the carrier together
- Easier/More intuitive ways to access the object (a better, more clear understanding of how to interact with the carrier)
- An obvious way to hold the carrier (a handle)
I also wanted to begin using less adhesive overall, and so I started straying away from the Gatcha machine idea. Instead, I focused on the rotating mechanism and how to express that in a different way.


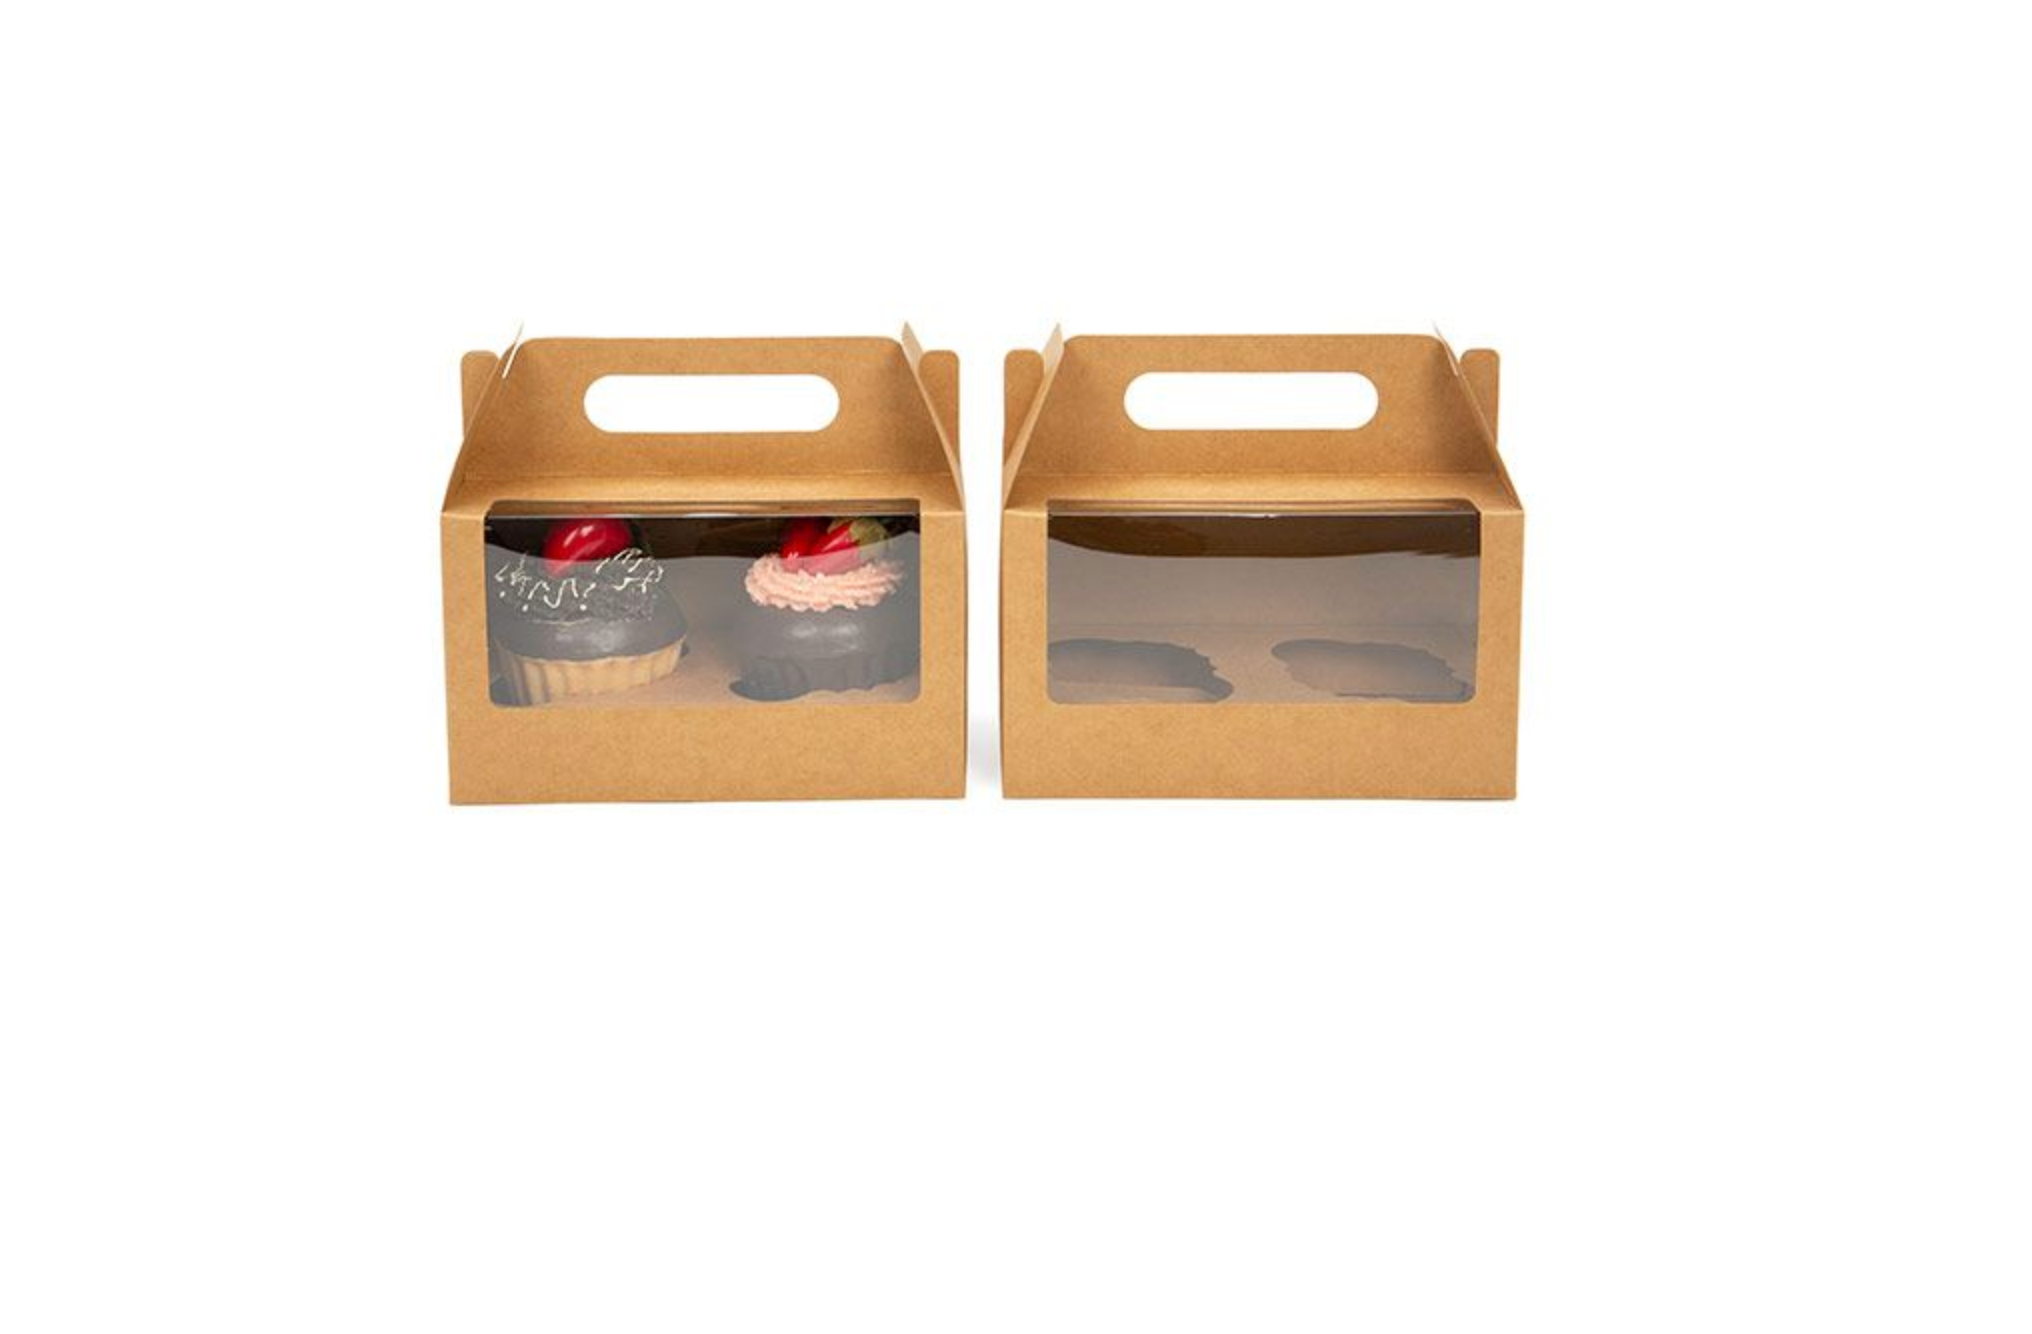
Thinking further about the connotations of sweets and how they are carried, I thought of creating and prototyping a carrier that looks like it could’ve come from a bakery, but still maintaining some of the earlier mechanisms I explored. This change is partially inspired by my peers who pursued objects of similar perceived value (such as other sweets) and how they approached the task to still emphasize the carrier aspect, which is something my previous iteration/mechanism was not able to do.
PRIMARY INSPIRATION
WORK IN PROGRESS


END RESULT


PROBLEM & CRITIQUES
REFLECTIONS AFTER WATCHING PEOPLE INTERACT WITH THE CARRIER
- The interactions with the carrier went much more smoothly this time, as people were much quicker to figure out how it was supposed to work. However, it was still far from seamless.
- People could tell where the handle was and how to hold it. Yay!
- The carrier could now successfully hold 6, rather than only 1–2.
- Generally, people seemed very happy interacting with the carrier. I did not get a good grasp of whether or not they were confused at the exterior design in relation to my object since some of them remembered that I was assigned Lindor chocolates from previous classes. (This observation was pointed out to me by a helpful classmate. Thanks!)
- People had a lot of trouble ‘undoing’ the movement, aka closing the carrier properly. This is where the majority of the problems with the movement was.
- Chocolates kept falling in the empty space in the box; unsure of how to fix this at the moment.
GROUP DISCUSSION DURING CLASS / CHOCOLATES & PASTA
- The box is very misleading on what it holds. It looks very ‘brick-like’ and bulky compared to the delicate nature of the chocolates themselves. From this, I realized that I should definitely prioritize creating a carrier that emphasizes & shows the shape of the chocolates because unlike cupcakes/macarons, these chocolates are relatively sturdy and actually do not require area-specific protection.
- New goal: Focus on how the carrier can give clues to the user in terms of what it contains.
- Again, people seemed to have a bit of trouble closing the box.
- While not as prominent, over-reliance on adhesive is still a present issue.
Goals for next class:
- No more adhesives!
- Create something with fewer pieces.
- Work on the reveal/exposure aspect of the carrier.
- The form is too bulky.
DESIGNING A CARRIER WITHOUT ADHESIVE
CARRIER ITERATION #3
I began by trying to translate the rotational aspect of my carrier from something dependent on adhesive to something more manual. I wanted to keep the rotational aspect of the carrier, mostly because I felt that rotations in response to the circular nature of the chocolates felt nature to me.
I also made it a point to explore the use of tabs in this iteration, as I knew I’d have to get familiar with not using adhesives to get cardboard to stick together. Moving forward with this, I wanted to explore more triangular/diamond shapes in order to better represent the form of the object, without having to compromise a lot of the structural integrity that would be lost with using too many spherical shapes.
INSPIRATION
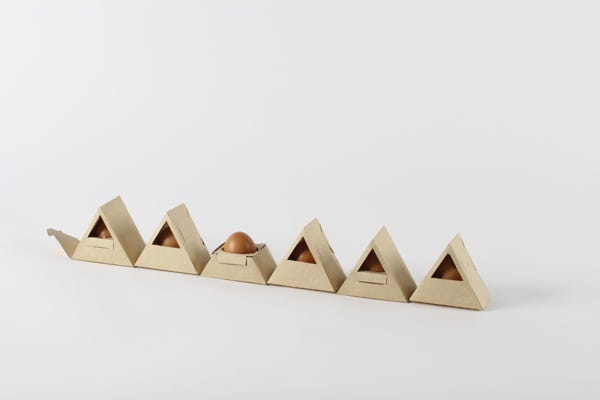
For inspiration in this segment, I mostly looked online as I was probably confused and lost in terms of how to approach this iteration. In particular, I looked at the packaging of eggs and how designers approach their shape in the context of carriers.
PROCESS:


I gradually examined the different approaches and aspects of each individual design that I liked, and eventually created a 2D blueprint of the piece rather than 3D, which is something different that I only did in this iteration. It came with certains positives and negatives:
PROS:
- Very easy to cut out & actually translate properly onto the cardboard, especially in the context of measurements.
- No constant readjusting of measurements.
CONS:
- I had very little idea of how the carrier would actually look & feel when actually put together. This is actually a huge negative, considering it turned out a lot larger and bulkier than I planned.
In the end, I had something that strayed pretty far from the original idea in my head, which really reinforced that I should probably stick to prototyping more by actually creating than just sketching. However, the measurements for this carrier turned out much better than any of the previous iterations, and in general, the mechanism stuck together and worked extremely well. Therefore, I want to strive to reevaluate my working methods to find a medium where I can be the most efficient yet accurate.
END RESULT


CLASS CRITIQUE & FEEDBACK SPEED DATING (?)


Person #1:
- the unnecessary motions are overly repetitive
- maybe consider 3 rows of chocolates rather than one (too many excessive space/cardboard)
- lack of symmetry is upsetting
- handle feels too large
- shape is not reflected in the carrier
- rhythm and movement is very well incorporated (but also could be better)
Person #2:
- It’s confusing to figure out which tab to pull
- Folding feels excessive and unnecessary
- The tilt is an interesting way to distinguish from the front and the back, but overall shape is weird
- feels exciting and fun to interact with but overall it’s actually a bit confusing to work with.
- the two rows of cardboard on the outside feel useless.
Person #3:
- The weight of the carrier feels secure
- triangular line of handle is not necessary/feels out of touch with the vibe of the carrier
- feels very fun and whimsical (is this also partially because of the chocolates?)
- feels very sturdy, like a lady’s purse (?????)
WHAT I LEARNT FROM INTERACTING WITH OTHER CARRIERS
- Don’t make tabs that pull out and tabs that are meant to stay in for stability look the same. I accidentally pulled a stabilizing tab out because the others all had the same function & appearance and I can envision this going wrong.
- A dual-function can sometimes not be as evident & go over my head if there are not any cues to suggest it beyond its primary use. (Psychology: people expect there to be one function and they’ll generally stop there.)
- Similarly, sometimes I will feel like I do not want to interact with the carrier in a certain way. I did not realize that I was supposed to do something, mostly because I didn’t feel secure in being able to & I did not necessarily see the point of it. Unpredictability can make people hesitant about interaction.
GENERAL THINGS TO LOOK OUT FOR (CLASS DISCUSSION)
- Eliminate unwanted & unexpected surprises (aka unintentional surprises that may put the user off in terms of experiencing the carrier. This could be either jarring or flat out unpleasant.)
- Better craftsmanship, eliminate the use of adhesive
- Apply subtractive methods rather than additive ones
DESIGNING A CARRIER
ITERATION #4
REFLECTION & INSPIRATION
In general, the feedback I got lead me to feel that I needed to simplify my carrier much further and that perhaps it’d be better if I chose to take this from a fresh perspective, especially because that the carriers I’ve made thus far did not really bring me a sense of joy in both their creation & usage.
The first step I took was to step back and reconsider my somewhat utilitarian approach to the carrier; instead of looking at eggs or other baked goods that require a far higher level of protection that these truffles do, I looked at the traditional mooncake boxes & packaging that I would send and receive on mid-autumn’s festival. Mooncakes are on a similar level of delicacy as the chocolates, and the fact they’re predominantly seasonal generally makes them feel a more ‘high-end’ or special feeling. In fact, I’ve come to realize that they have a bunch of similarities:
- Individually packaged inside a larger carrier
- Rounded yet sturdy with no visible ‘weak’ spots like cupcakes
- Presented like presents due to their nature (Lindor chocolates are sometimes placed in a box, especially when there is a higher quantity of them)
- Mooncakes have softer centers, truffles have softer centers (?)
From here, I thought about how to incorporate circular designs & motifs into the packaging while maintaining the delicate yet exciting aspects.
I eventually chose the motif of a flower and to incorporate a kind of opening mechanism that would allow the flower to ‘bloom’ towards you, while maintaining a circular form even while closed (different stages of the carrier). This is partially inspired by Asian origami as well.
END RESULT


GROUP FEEDBACK / CHOCOLATES & PASTA
- General notes:
- Craftmanship is kicking our asses
- Instead of circles, try hexagons (structural stability → needs to go simpler)
- Don’t force the cardboard to do what it doesn’t want to do (small tabs, rotating, etc.) → “don’t make a car out of toilet paper”
- Specific Feedback for my carrier:
- Difficult to return carrier back to its original state. (Especially if you have small hands!)
- Why choose hexagons over pentagons?
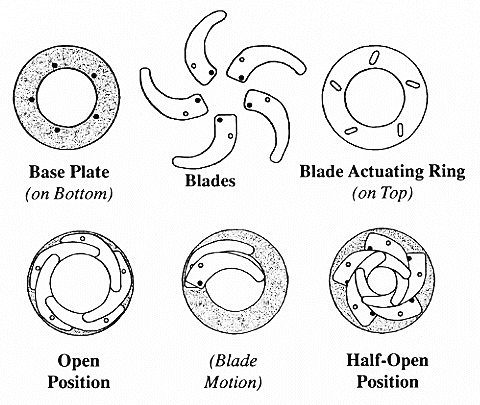
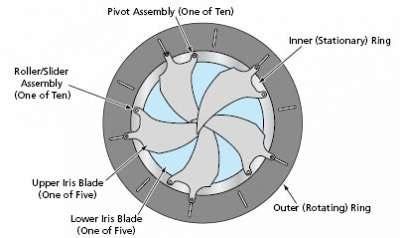
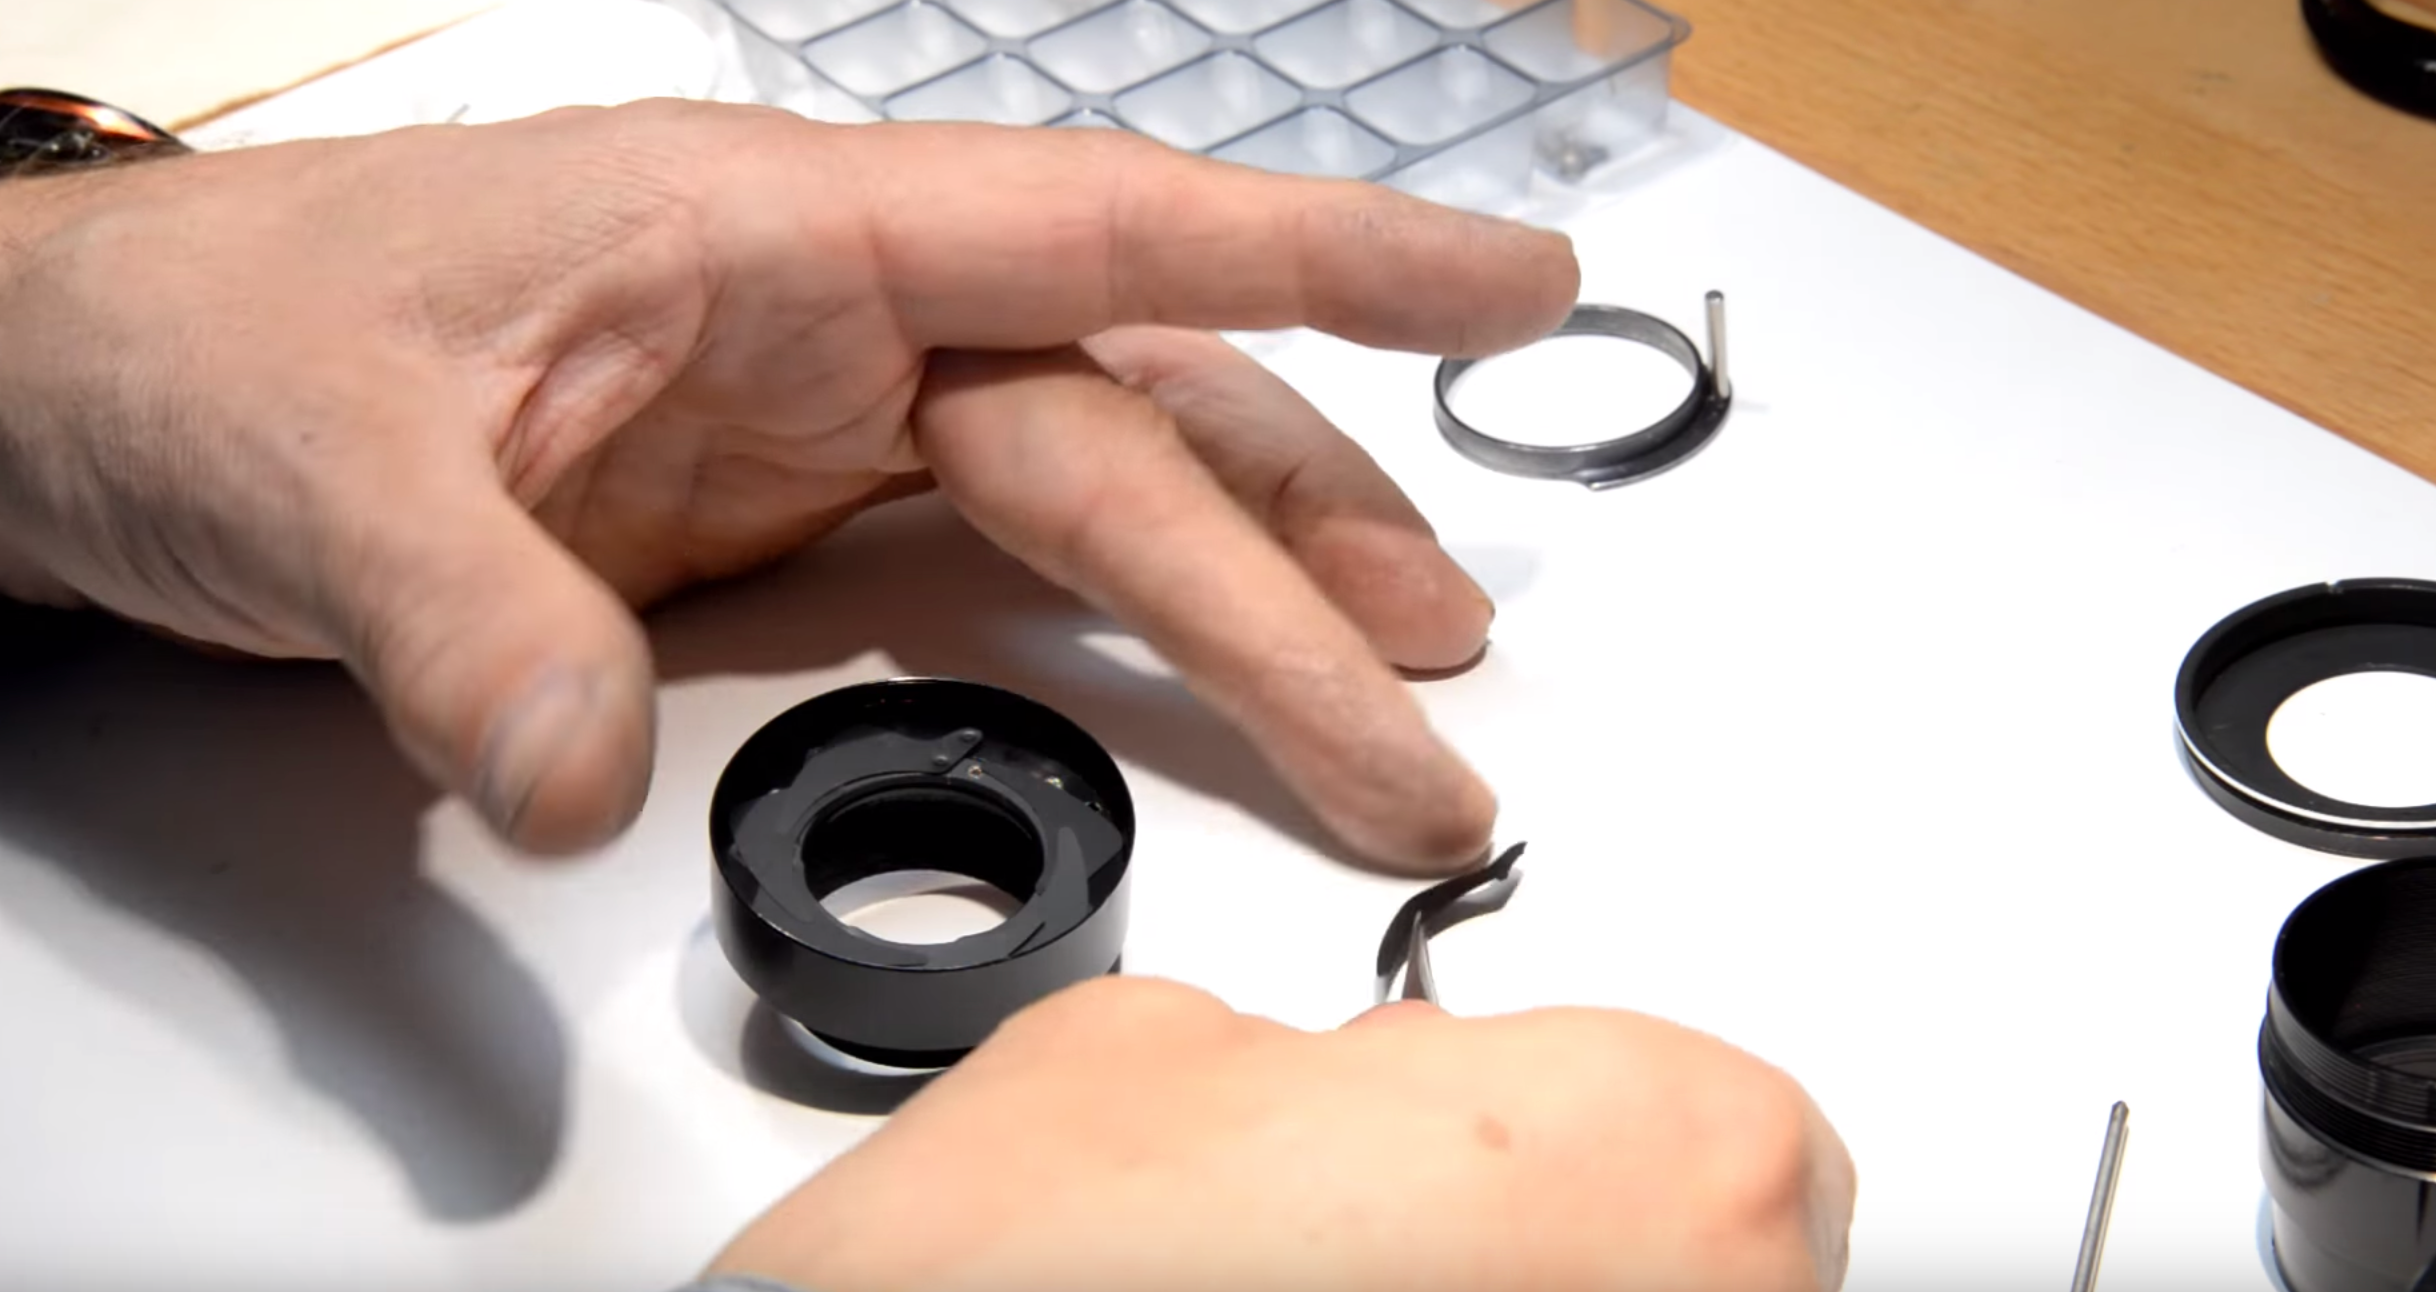
- Look into hexagonal prisms & ‘Iris’ mechanisms (can be found in fast food containers & camera aperture lens) → this can eradicate the need to coordinate all six petals at once.
CREATING A FINAL CARRIER
LAST (5th) ITERATION:
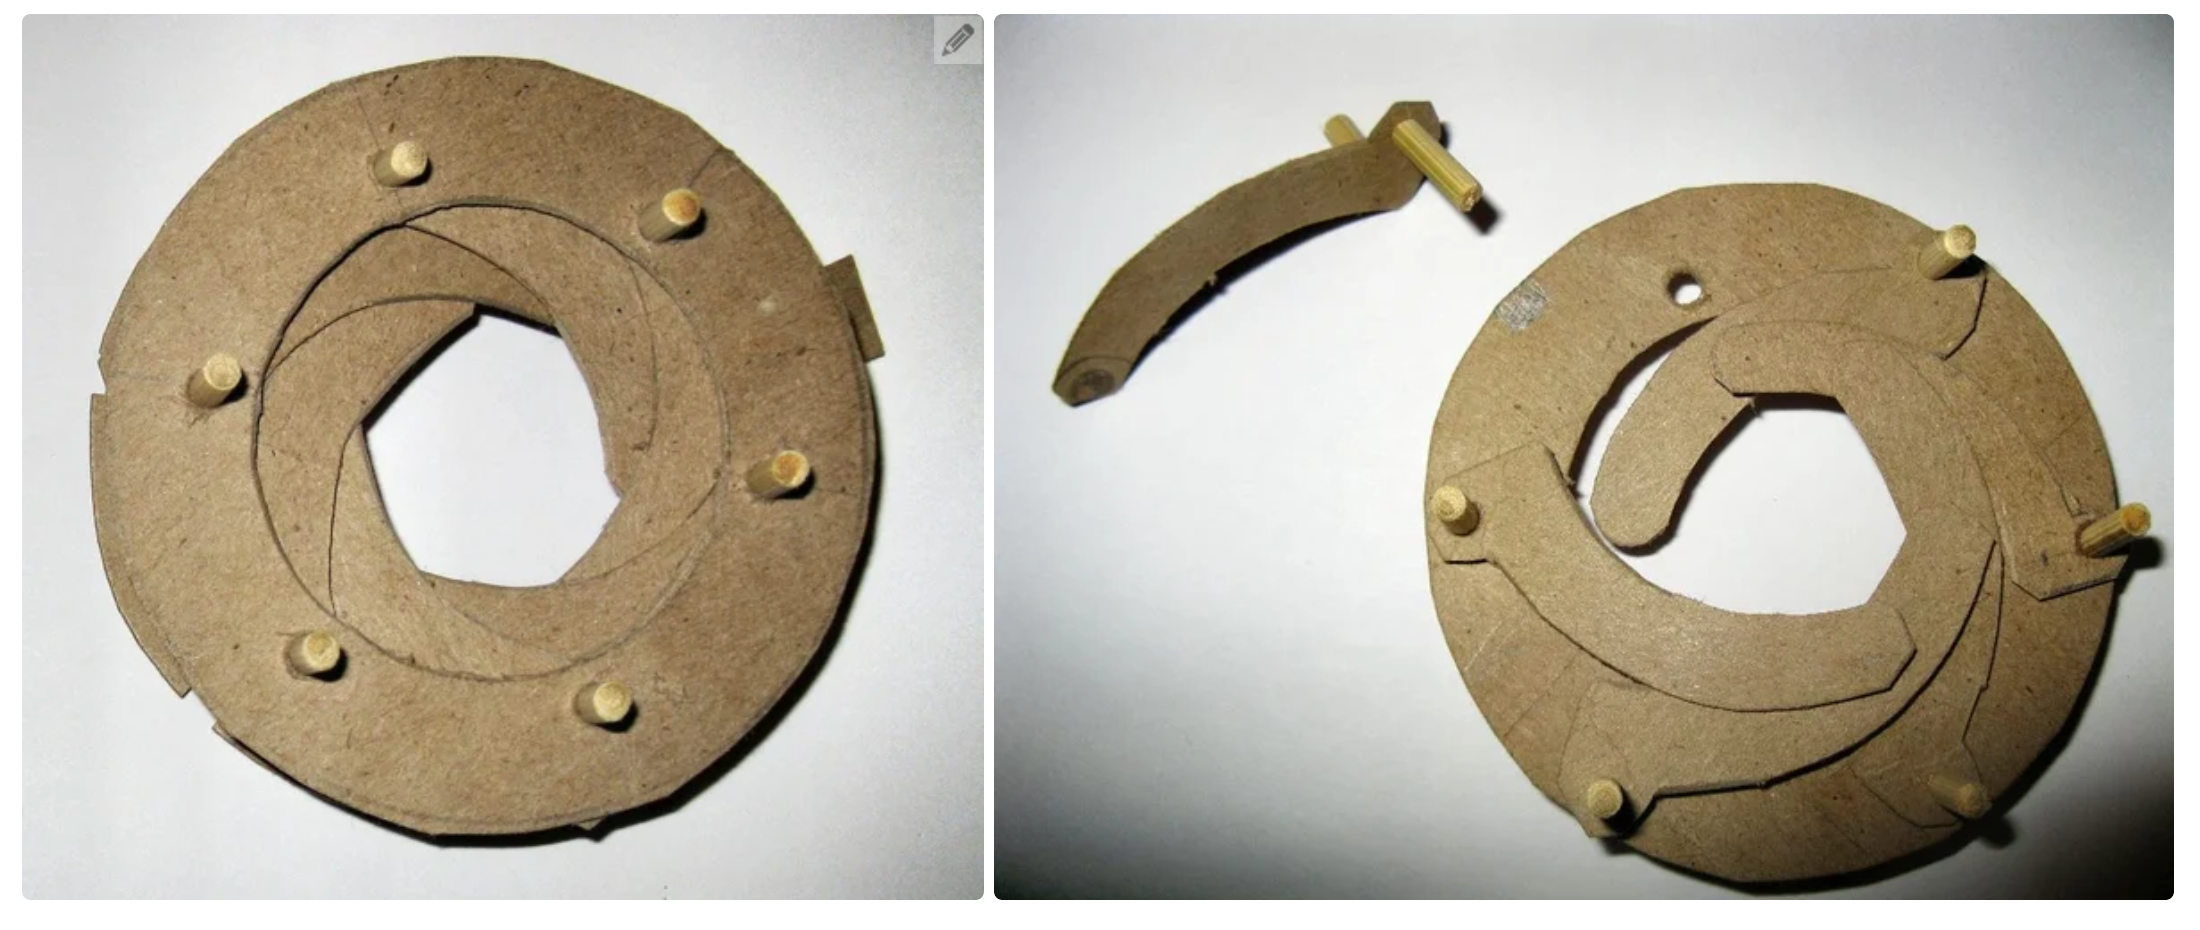
I began by researching the ‘Iris’ mechanism and how to best incorporate aspects of that into my carrier. Through research, I got a general understanding of how the mechanism for coordinating all the individual blades opens and closes by controlling only one part.
However, the rotational aspect of the lens doesn’t seem entirely doable without any kind of adhesive (or metal screw, actually), and given the bulky nature of the cardboard, I sought to simplify it before attempting to incorporate it into my carrier. I thought about doing this in a variety of ways:
- Limiting the number of blades
- Rather than rotating out, flip open so you can work at an angle rather than a flat plane (kind of like iteration #4)
Essentially, I decided to prioritize taking away consistent opening & closure on my models and focus on designing a mechanism that allowed the user to open and close the ‘lid’ with the same number of movements while retaining some of the visual and aesthetic components of the hexagonal prism and the iris/aperture lens.
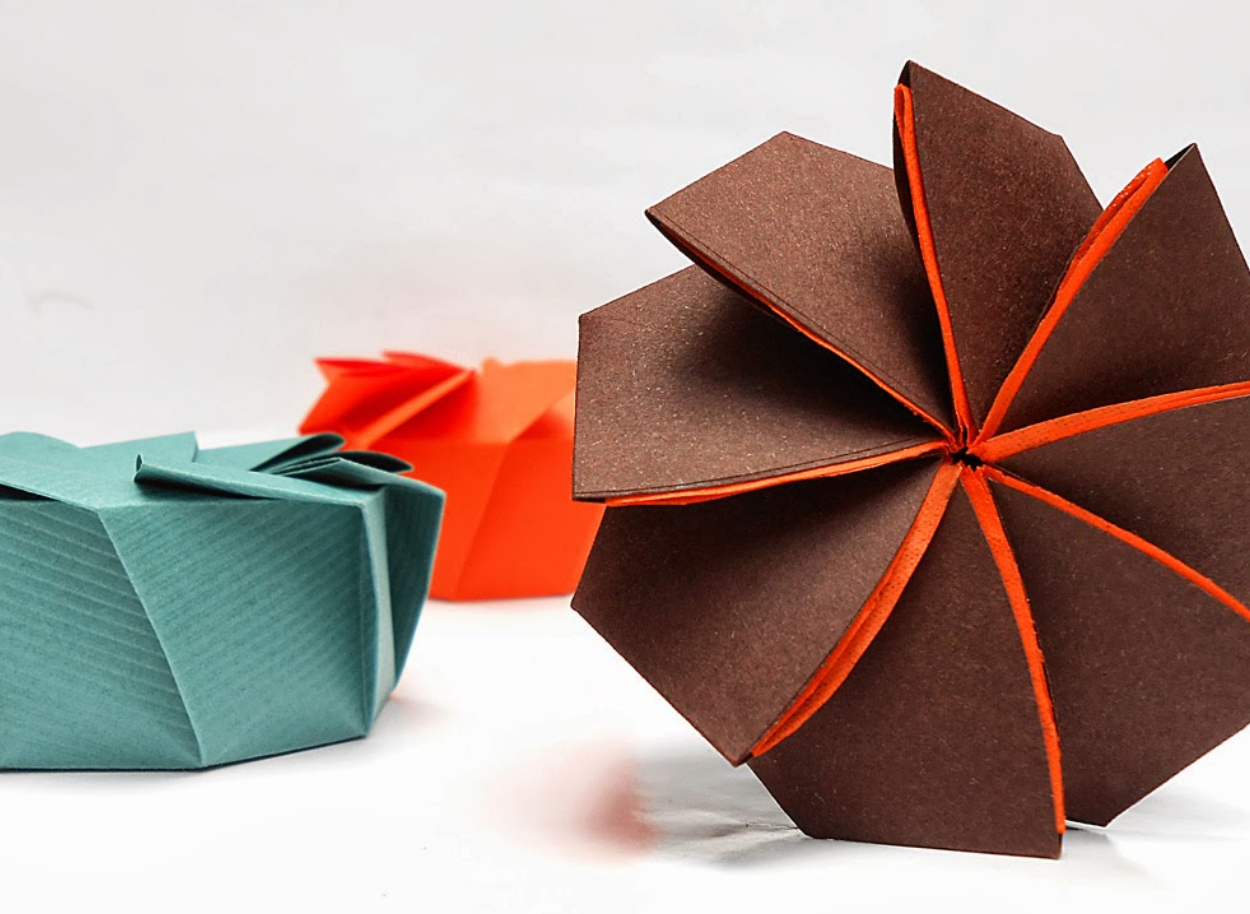
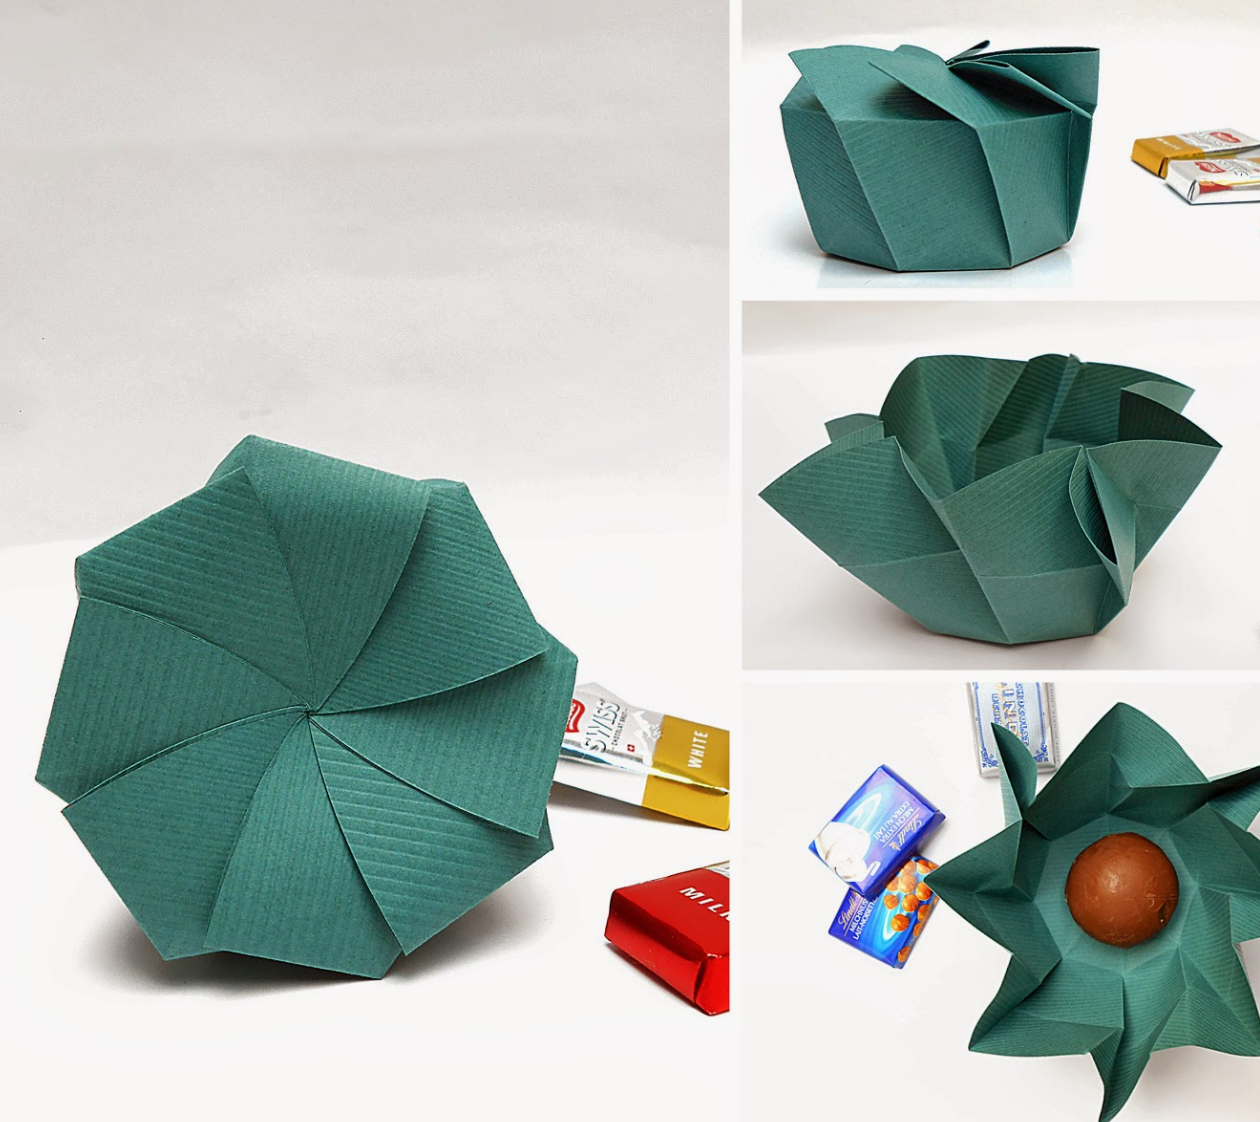
After running through a variety of possible ideas, I began to look into origami and how that is able to convey the mechanism through paper. After looking at some of the visual inspiration below, I was inspired to cut two of the three layers of corrugated cardboard away in order to keep the body of the petals primarily attached to itself.
However, this created many more difficulties than I originally anticipated, and I went through another 4 iterations before successfully being able to create a variation that worked. I decided to incorporate elements of iteration #4 more heavily, particularly the parts that worked well.
Overall, I focused my efforts on dealing with issues of closure and craftsmanship, to varying degrees of success.


TRIAL #1
the box folded together well enough, but the cover didn’t really contain anything and it ended up splaying outwards because there wasn’t anything holding it back. Additionally, while the wavy pattern was symbolically on point, it creased the cardboard after single uses because the cardboard couldn’t really effectively bend at an angle that would allow for the movement to happen seamlessly.

TRIAL #2
For this rendition, I attempted to create a lid structure to get the petals better contained. However, the width of the cardboard was simply too small to be scored without damaging the cardboard AND also stay in place.
I then edited it to consider the use of tabs to hold it in place.


TRIAL #3
Well this iteration actually accomplished what I was trying the achieve, the use of tabs simply looked too unstable and poorly crafted to be considered a viable solution.
At this point, I turned back to iteration #4 because there were things that definitely worked better in that version that this new version was not able to accomplish.
FINAL


REFLECTION
POSITIVES
Throughout this project, I genuinely felt as if I had learnt a lot about using corrugated cardboard as well as specifically using them to design carriers. There were a lot of things that went into the process of designing a successful carrier, many of which I did not consider prior to this project. Here are some of the highlights:
- While not as polished and “seamless” as I’d like, I enjoyed my final iteration of the carrier as it presented the chocolates in a way that I felt like conveyed the appropriate feeling of joy & ‘specialness’.
- I got the opportunity to play around with many mechanisms, many of which I was genuinely curious about prior to starting the project.
- The challenge of taking in consideration all the ways a carrier could be made to feel special was always exciting.
- Having a finished product that you were able to physically hold was incredibly satisfying.
- There were lots of new ways to apply information we intuitively know about the world in a different context that required us to consistently think on a deeper level than we would usually.
- I got really good at cutting cardboard circles!
CRITIQUES
I definitely experienced more problems than I originally anticipated throughout the duration of the project. Some of them are:
- Craftsmanship (the ability to cut & construct precisely and skillfully) got in my way a lot, especially during the beginning of the project.
- My finished final carrier was not nearly as functional/consistent in its performance as I wanted it to be, which means that more troubleshooting is in order before this can be consistently qualified as a ‘carrier’.
- I lacked a lot of experience when it came to working in 3D in real life, and I was definitely not used to the time prototyping wound up taking. I was eventually able to learn to be much more careful while working, but the learning process definitely lead to some frustration.
- I definitely felt like I focused too much on mechanics at the beginning of the project, rather than the overall carrier itself. It took me a lot of time to get into the mindset where I had to consider everything about the form and interaction & if I were able to do this again, I’d take an approach that involves a lot more refining as I felt like my final project definitely feels like something ‘in-development’ rather than completed and done with.
- As I was developing the carriers themselves, I was also developing my ability to begin a project and work it through to the end. Even now, I’m not entirely confident in my ability to approach this type of project; though I definitely have a much better idea of what I’m doing now as compared to the beginning of the project.
- Lack of consistency in my approach: I felt like I spent too much time just purely exploring rather than approaching the project from an actually well-structured angle. This lead to a lot of setbacks, re-dos, and scrapped ideas. While I feel like this helped me learn a lot overall, it still feels like a shame that there were many cool things I discovered that never made it near my final iteration.
